
Adding a tiled surround or pavers around your spa pool is one of the most effective ways to elevate your outdoor space. A tiled surround gives your spa a seamless, built-in look while enhancing comfort and aesthetics. This guide will walk you through how to create a custom tiled spa area yourself, whether you’re a seasoned DIYer or just getting started.
Why Spa Pools Work Well in Various Climates
Spa pools can be enjoyed year-round in many climates. In warmer regions such as the Bay of Islands or Auckland with humid summers and mild winters, they’re perfect for a soothing soak at any time of year. Even in cooler regions like Queenstown or Wanaka, a heated spa offers a cosy retreat during chilly months.
As more homeowners embrace outdoor living, integrating spa pools into decks, patios, and landscaped gardens continues to grow in popularity. A tiled surround not only boosts visual appeal but also blends the spa seamlessly with the rest of your outdoor area, creating a cohesive look for your backyard oasis.
Spa Surround Trends: Blending Style and Functionality
Many New Zealand homeowners are investing in personalised, resort-style outdoor spaces. Some of the latest spa design trends include:
1. Flush-Mount Surrounds
Tiling your spa surround to sit level with decking or paving creates a seamless transition and modern, minimalist look.
2. Natural Materials
Stone-look tiles, terracotta or pavers, travertine, and textured porcelain are popular for their earthy tones and durability in outdoor settings.
3. Smart Lighting and Features
Integrating strip lighting into the tile trim or adding built-in benches and planters makes your surround both functional and beautiful. For instance, strip lighting can be installed under overhangs or steps to create a relaxing ambiance, while built-in benches and planters can provide convenient seating and decorative elements.
4. Fully Enclosed Surrounds
Some DIYers go a step further by building raised tiled platforms or full enclosures that conceal the spa frame entirely, creating a built-in appearance.
Step-by-Step Guide to DIY a Tiled or Paved Spa Surround
Step 1: Plan Your Design and Measure Accurately
Start by deciding on the layout. Do you want the spa to sit flush with the deck? Or slightly raised with steps and a bench? Consider the look you’re aiming for and how it will fit into your outdoor space.
Key Considerations:
- Allow at least 500mm clearance around the spa for servicing and ventilation
- Ensure you can still access spa panels for maintenance
- Decide whether the surround will be fully or partially enclosed
Tip: Sketch out your plan and use a tape measure to check clearances and proportions. Consider drainage and water run-off if your area gets heavy rain.
Step 2: Build a Sturdy Frame
Construct a timber frame around the base of your spa pool. This will support the cement board and tiles.
Materials You’ll Need:
- H3.2 treated timber (for outdoor durability)
- Galvanized nails or exterior screws
- Joist hangers (for added support)
Tips for Success:
- Use a spirit level to ensure your frame is even
- Anchor the frame securely to a concrete pad or decking structure if possible
- Consider framing around any steps or ledges you want to include
Step 3: Install Cement Backer Board
Once your frame is secure and level, attach tile backer board (cement board) to the timber.
Steps:
- Cut cement board to size using a circular saw with a masonry blade
- Attach using exterior-grade screws spaced 200mm apart
- Apply waterproof mesh tape over joints
- Coat seams and screw heads with a waterproof compound
Pro Tip: Use a paint-on waterproof membrane over the entire board surface to ensure longevity. This membrane acts as a barrier against moisture, preventing water from seeping into the cement board and potentially causing damage to your tiles or the structure of your spa surround.
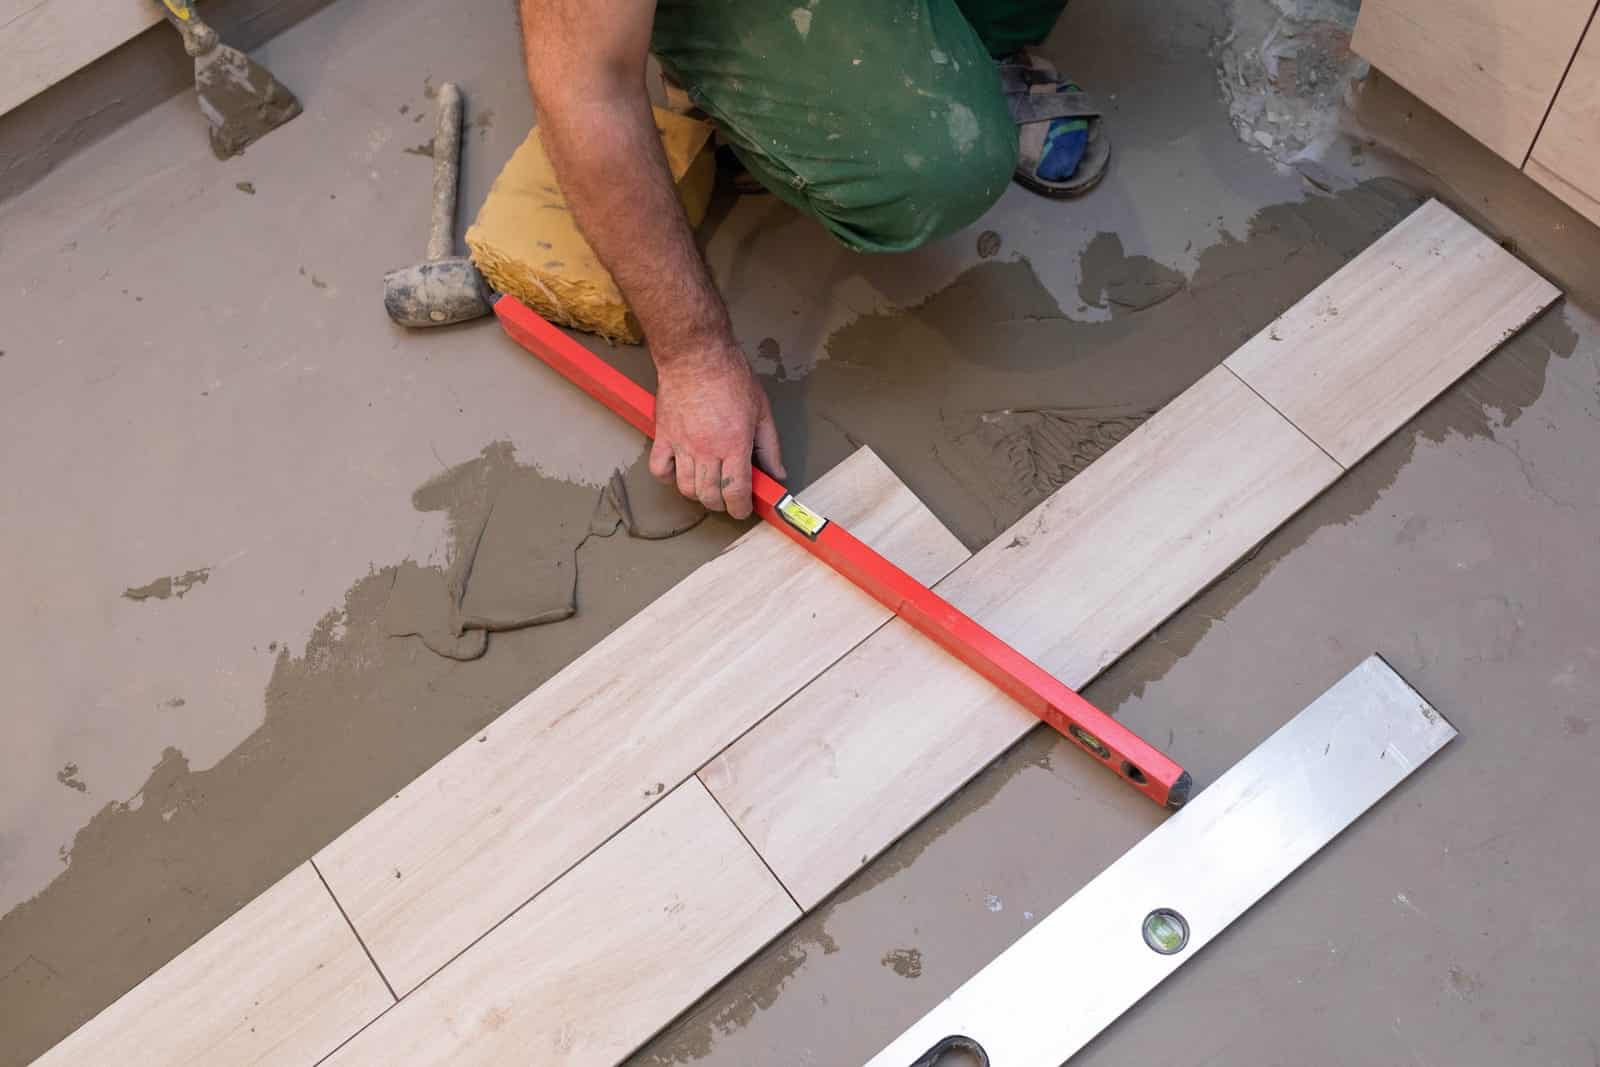
Step 4: Choose and Lay Your Tiles
Choose tiles that are outdoor-rated and slip-resistant. Natural stone, textured porcelain, or concrete-look tiles are all excellent choices.
Tiling Process:
- Apply a flexible, exterior tile adhesive with a notched trowel
- Lay tiles with spacers to maintain consistent grout lines
- Use a tile cutter or angle grinder to trim edges
- Allow adhesive to set for at least 24 hours
Design Tip: Use matching bullnose or edge tiles for a professional finish on corners and steps.
Step 5: Grout and Seal the Tiles
Once the adhesive is dry, grout between the tiles using a waterproof, flexible grout.
Instructions:
- Use a rubber float to apply grout
- Wipe off excess with a damp sponge before it sets
- Allow grout to cure for 24 hours
Finish by sealing both the grout and tiles with an outdoor-grade sealer to protect against moisture, chlorine, and weathering.
Step 6: Add Finishing Touches
To give your tiled spa surround a polished look, consider the following additions:
- LED lighting strips under overhangs or steps for ambiance
- Tiled bench seating nearby for convenience
- Decorative planting to frame the spa
- Glass balustrades for safety and style
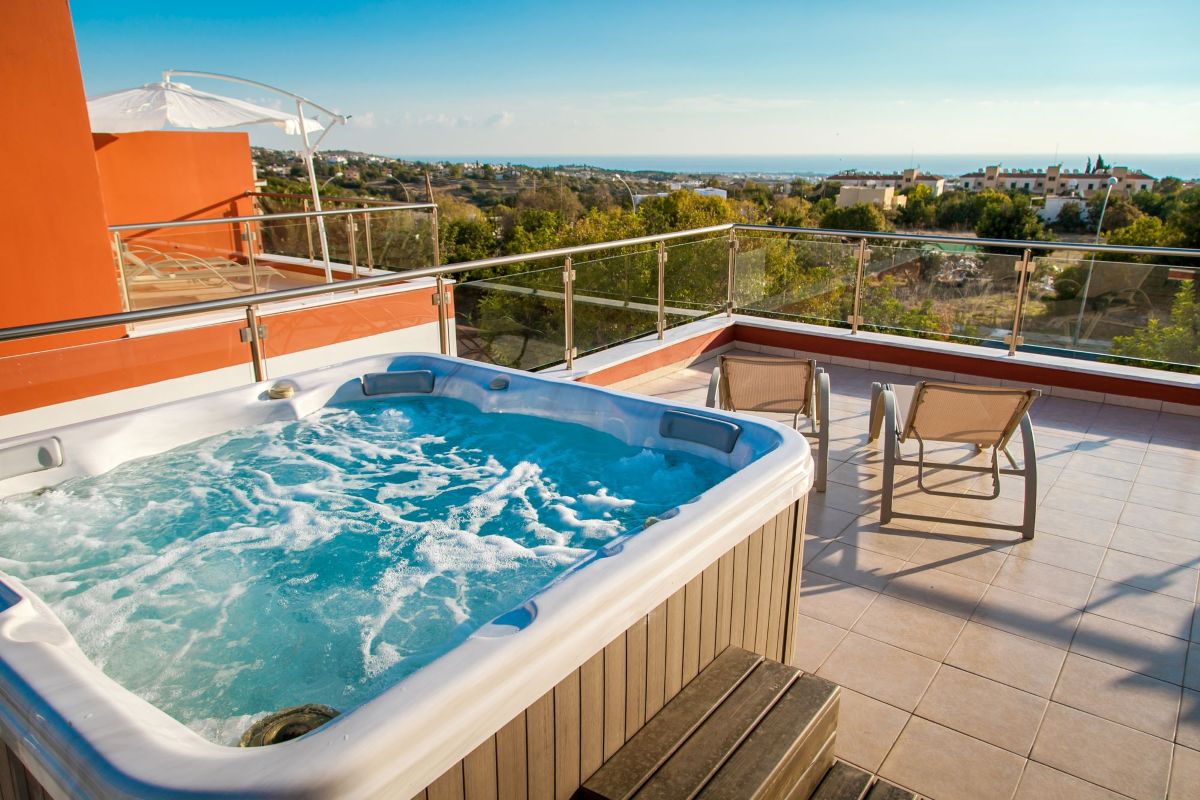
Benefits of Quality Spa Pools
When choosing a spa pool to complement your custom surround, look for models with these features:
- Energy efficiency for lower running costs
- Durable construction that will last many years
- Quality hydrotherapy jets for maximum relaxation
- Good insulation for heat retention
- Reliable warranty coverage
High-quality spa pools are the perfect candidates for custom tiled surrounds like the one described in this guide.
At The End Of The Day
A custom spa surround, whether you choose elegant tiles or durable pavers, can transform your outdoor area into a sanctuary of style and relaxation. This rewarding DIY project can completely change your backyard and enhance your daily lifestyle. With careful planning and some effort, you can design a beautiful, functional, and durable surround that reflects your personal style and creates a resort-style retreat in your own backyard. The sense of accomplishment from completing this project will be truly satisfying.
Pair your tiled surround with a premium spa pool and indulge in luxury living every day of the year. The comfort and relaxation a spa pool provides is unparalleled, making it a perfect addition to your outdoor oasis.
Read our article on mistakes to avoid with pool fencing too!